Homemade Vanilla Extract

When you look at the label of a high-quality bottle of vanilla extract, you’ll generally find two ingredients: alcohol and vanilla. It’s true–one of the most expensive and commonly used baking ingredients is really that simple. In fact, vanilla extract can easily be made at home with a little patience and…well, more patience. Surprised? I was.

I’ll start with the bad news: this isn’t going to be an instant gratification project. It will be the exact opposite actually. Two whole months of waiting, watching the contents of the bottle slowly grow darker and darker until it resembles real vanilla extract. The good news: it is well worth the wait! Once your extract peaks, you can keep topping the bottle off with more alcohol as you use it. The same vanilla beans will continue to give flavor.

Making your own vanilla extract also gives you full creative license over the flavors. Different types of vanilla will produce subtly different results–including Madagascar, Tahitian, and Mexican to name a few. The alcohol you choose to use will also affect the flavor of the extract. Vodka is virtually flavorless and will yield the most clean vanilla taste. On the other hand, rum adds another dimension of flavor that pairs well with so many baked goods. I chose to use rum because I like the extra spice it gives my pumpkin pies, cakes, and cookies.

With the holiday season coming up, vanilla extract also makes a fabulous gift! Friends and family will be impressed by your mad kitchen skills. If you want to make a larger batch, just use the 3 vanilla beans:1 cup alcohol ratio.

Homemade Vanilla Extract

  • 3 vanilla beans
  • 1 cup vodka or rum
  1. Using the tip of a sharp knife, split the vanilla beans in half, leaving an inch on each end intact.
  2. Place the beans inside a sterilized bottle or jar and fill with your choice of alcohol. Secure the bottle or jar with an airtight lid and place in a cool, dark place.
  3. Gently shake up the bottle about once a week. Vanilla should be ready to use after 2 months.

I picked up these gorgeous Madagascar vanilla beans from World Spice Merchants downtown.

Carefully cut the vanilla beans down the center, leaving an inch on each end intact.

I decided to use rum since I like the extra kick it gives my baked goods. You can also use vodka for a cleaner vanilla flavor.

And the waiting begins! When you are ready to use your vanilla, there may be a few specks of vanilla bean floating around in the extract. Generally, I don’t see this as a problem–it’s just extra flavor! However, if this bothers you, you can easily strain the extract through a coffee filter before using.

Sweet and Salty Bacon Jam

Wow, what a week. I just came back from an awesome trip to the Bay Area where I relaxed with my family and caught up with old friends. During my trip, an extra awesome thing happened: my homemade beef jerky post was featured on Freshly Pressed. My lowly little blog making it onto the front page of WordPress was an unexpected, but welcome surprise! Thank you sincerely to everyone who sent me feedback.

And now….back to reality!

I decided to try my hand at bacon jam a couple weeks ago because I was craving a sweet and salty sensation. Bacon jam has been popular for quite some time now, thanks to our local Skillet who sells it by the jar. To my pleasant surprise, it is also very easy to make at home. It does require a couple hours of cook time, but the trade off is that you have more control over the balance of flavors. Totally worth it in my book. Be forewarned that a full batch of this recipe completely filled one of my three cup mason jars. But who can ever have too much bacon jam?

This condiment adds an extra special touch to eggs, grilled cheese sandwiches, burgers, baked potatoes, cheese and crackers, and more. A little bit goes a long way, so when eaten in moderation it’s not completely unhealthy. Right!?

It’s a bit unfortunate that this bacon jam post came on the heels of my old beef jerky post being featured, because now I look like some carnivorous freak. I swear it’s just a coincidence! More fruit and veggie posts coming soon, I promise.

Bacon Jam
Recipe adapted from Martha Stewart using The Perfect Pantry method

Yield: About 3 cups

  • 1 -1/2 pounds sliced bacon, cut crosswise into 1-inch pieces
  • 2 medium yellow onions, diced small
  • 3 garlic cloves, smashed and peeled
  • 1/2 cup cider vinegar
  • 1/2 cup packed dark-brown sugar
  • 1/4 cup pure maple syrup
  • 3/4 cup brewed coffee
  • Cayenne pepper to taste
  • Salt to taste
  1. Cook bacon in a large cast iron pot over medium heat, stirring occasionally, until fat is rendered and bacon is lightly browned (approximately 20 minutes, depending on the thickness of the bacon). With a slotted spoon, remove the bacon and place on a platter lined with paper towels.
  2. Pour off all but 1 tablespoon of bacon fat. (Save the fat for another delicious use). Add the onions and garlic, and cook until onions are translucent. Add 1/2 cup vinegar, 1/2 cup brown sugar, 1/4 cup maple syrup, and 3/4 cup coffee, and bring to a boil, stirring and scraping up the bacon bits from the bottom of the pan. After 2 minutes, add the bacon, and stir to combine.
  3. Reduce heat to simmer, and cook, uncovered, for 2 hours, stirring occasionally to make sure nothing is burning. If the jam seems to be cooking too fast, add 1/4 cup of water every now and then.
  4. Toward the end of the 2 hours, taste the jam and see what flavors you need to add. This recipe is about finding the right balance–and it just comes down to personal preference. I added some salt to balance out the sweetness, and some cayenne pepper give the jam a nice spicy kick.
  5. When the liquid is syrupy, remove the pot from the heat. Let it sit for 5 minutes, then transfer contents to a food processor and pulse 3 or 4 times until coarsely chopped. Transfer to a heat-resistant bowl. Let the jam cool, then refrigerate in an airtight container for up to a month.

Start by rendering the bacon, and draining off all but one tablespoon of grease. Save the remaining grease in an airtight container in the fridge for another use.

Saute the onions and garlic to bring out their delicious flavors.

Add the remaining ingredients, grab a good book, and wait for the magic to happen.

Bacon mixture after an hour of cooking. Stir periodically to make sure it’s not cooking too quickly and burning.

Toward the end of the two hours, do a taste test and see if you want to add any salt or cayenne pepper. If you’ve never worked with cayenne before, be very careful–a little goes a long way. When the mixture takes on an almost syrupy consistency, you’ll know it’s ready to hit the food processor.

Use your bacon jam on absolutely anything. My boyfriend Jeff was a huge fan of my grilled cheese with arugula and bacon jam. It’s also delicious simply spread on a piece of toast with a poached egg on top.

What would do you do with your bacon jam? Do you have any creative ideas for the leftover bacon grease?

Kitchen Adventures: Fresh Homemade Ricotta

Homemade ricotta is one of the best kept secrets. It’s affordable, delicious, and oh so easy. Once you try ricotta from scratch you will never be able to go back to store bought. Technically, ricotta (which means “re-cooked” in Italian), is actually made out of whey left over from the production of a rennet-based cheese (such as mozzarella).  But this process is long and laborious, so unless you’ve got a lot of free time on your hands, let’s take the short cut, shall we?

This process takes about 30 minutes to complete, and about an hour of hands-off time to let the ricotta drain. There are a couple of important things you need to know before you get started. First, the dairy. Your ricotta will be as good as the milk and cream that you use. You don’t necessarily need to spend a small fortune at a the farmer’s market if that is not within your budget, but at least try to buy a higher quality brand of dairy. (I bought mine from TJ’s) Most importantly, do not buy any dairy labeled “ultra-pasteurized” or “ultra-high temperature” for ricotta, or any cheese for that matter. Pasteurized milk is what you want. I repeat: DO NOT use ultra-pasteurized, or you will fail miserably and hate me forever.

There are numerous ricotta recipes making the rounds, but my favorite is an old Gourmet magazine that uses the acidity of fresh lemon juice to produce the ricotta. In terms of special equipment, you will need fine-mesh cheesecloth. However, if you have a very fine-mesh colander, you can get away without the cheesecloth at all.

Homemade Fresh Ricotta
Adapted from Gourmet

Yield: About 2 Cups

  • 2 quarts whole milk (8 cups)
  • 1 cup heavy cream
  • 1/2 teaspoon salt
  • 4 tablespoons fresh lemon juice
  1. Line a large colander with one layer of fine-mesh cheesecloth or a few layers of standard cheese cloth. Place colander over a large bowl.
  2. Slowly bring  2 quarts milk,  1 cup cream, and 1/2 tsp salt to rolling boil in a 6-quart heavy pot over moderate heat, stirring occasionally to prevent scorching. Resist temptation to crank the heat up to high.
  3. Once the milk mixture starts boiling, pour in 4 tbs lemon juice. Reduce to a simmer and gently stir until mixture curdles, about 2-4 minutes.
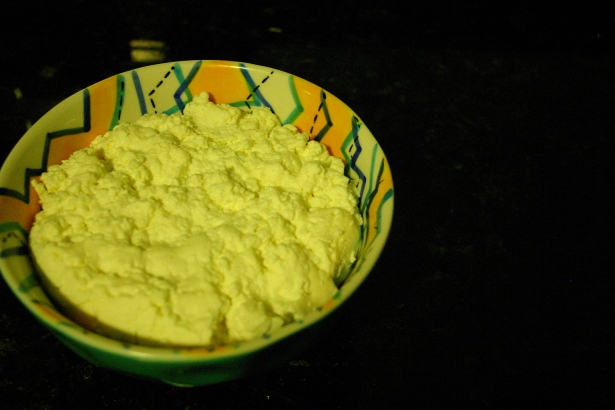
  4. Pour milk mixture into lined colander and let drain for up to an hour. For a creamier consistency, put the ricotta in a food processor with a splash of heavy cream and pulse a couple of times. Keep in air tight container in the fridge for up to two days.

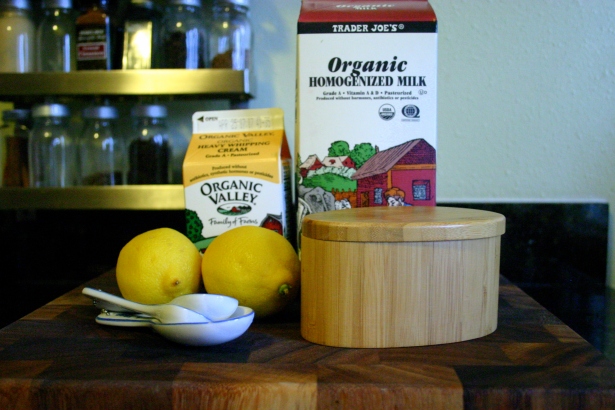
Making ricotta requires minimal ingredients–essentially dairy and an acid. I like the taste of lemon in my ricotta, but you can also use good quality vinegar instead. Alternately, some recipes use buttermilk.

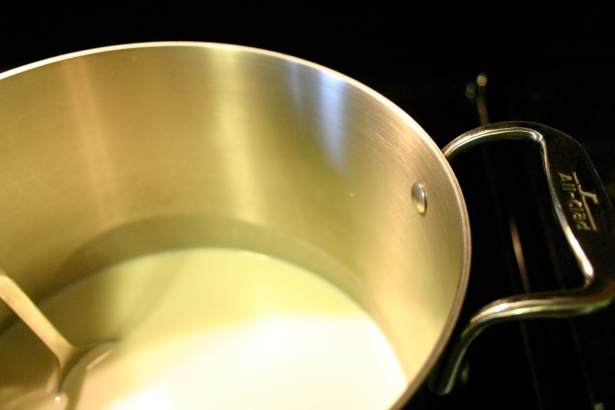
SLOWLY bring milk mixture to a boil, and be sure to keep stirring periodically so it doesn’t burn.

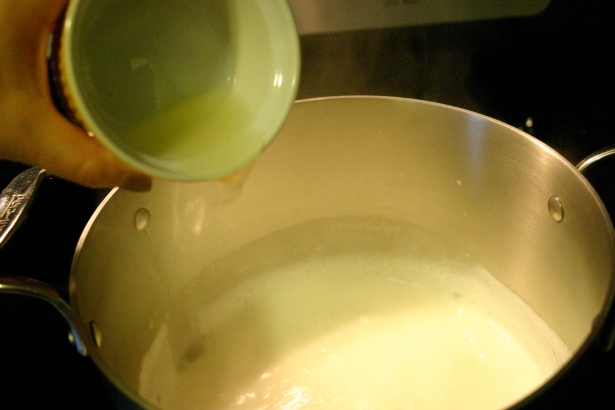
After you pour the fresh lemon juice in, turn the heat down to a simmer and stir very gently. The mixtures should begin to curdle after a minute or so. If your mixture doesn’t start to curdle, don’t freak out…like me! Just calmly pour in more lemon juice one teaspoon at a time until you see a reaction, and be sure the mixture is really simmering.

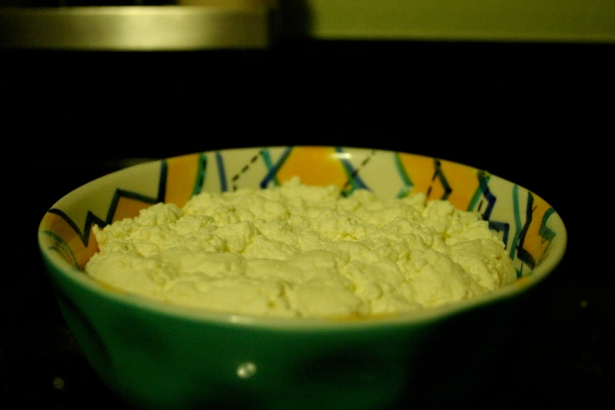
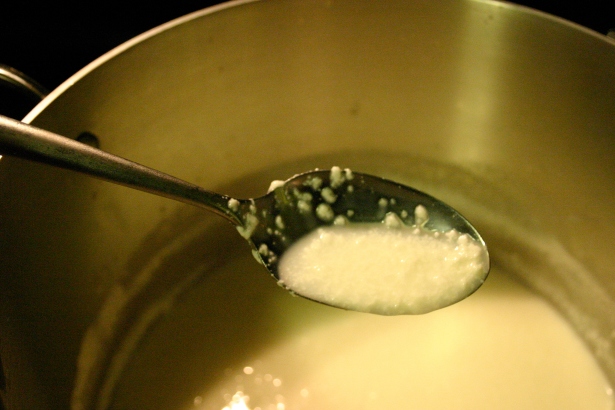
After a couple of minutes, the curds will separate from the whey, like so.

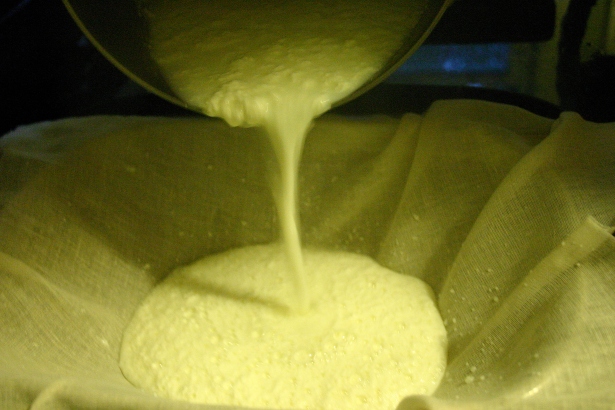
Pour the mixture into the cheesecloth-lined colander and drain. You can place a bowl under the colander to catch the whey. I’ve heard that this can be used in place of buttermilk in recipes. Or as plant food. Or to thicken soups. I have yet to try this.

Now, what to do with all this ricotta? Here are some ideas to get you started:

  • Ricotta Gnocchi (delicious and easy! Post on this coming soon)
  • Lemon Ricotta Cookies
  • Serve warm as an appetizer with bread. Drizzle some olive oil on top and sprinkle with kosher salt. Add some fresh herbs, sun dried tomatoes, or toasted pine nuts if you have some handy.

Kitchen Adventures: Homemade Beef Jerky

I’ve always had a weakness for beef jerky. There’s something satisfyingly primitive about tearing into a piece of dried meat and all its salty goodness. It’s the perfect snack–high in protein, low in fat, and undeniably delicious.  I’ve always eaten store-bought beef jerky out of convenience, but the sad fact is that the  mass produced stuff is chock full of preservatives, artificial flavorings, and nasty additives.

I recently learned that beef jerky is surprisingly simple to make at home with nothing more than a few quality ingredients and your oven–no dehydrator required. But there’s one catch. Homemade jerky does take a little time–six hours to marinade and four hours to bake,  to be exact. But before you freak out, keep in mind that there is very little hands-on effort required. This is actually a great lazy Sunday activity. Prep the meat when you wake up, marinade while you grab brunch and run errands, then cook the jerky while you shamelessly watch hours of Real Housewives on Bravo. Or, perhaps you could actually do something productive around the house while you’re waiting. Your call! But the bottom line is that this doesn’t require a ton of effort, and the results will be worth it.

One of my favorite recipes for beef jerky comes from Rachel Graville, proprietor of Iris Cafe in Brooklyn Heights, where she also sells her delicious hand-cut beef jerky. I made a half batch of the recipe below, because I didn’t have enough baking sheets/cooling racks to accommodate two pounds of meat. A full batch will yield about one pound of jerky, while a half batch will yield about 1/2 pound–which I found to be perfect for two people.

Black Pepper Beef Jerky
Adapted from Rachel Graville via Food & Wine
  • 2 pounds trimmed beef top round (London broil) or bottom round, about 1 1/2 inches thick
  • 3 cups amber ale or lager
  • 2 cups soy sauce
  • 1/2 cup Worcestershire sauce
  • 2 tablespoons cracked peppercorns, plus additional coarsely ground pepper to sprinkle on meat before it goes into the oven
  1. In a large bowl, mix 2 tbs cracked peppercorn, 2 cups soy sauce, 1/2 cup Worcestershire sauce, and 3 cups beer.
  2. Slice beef 1/4 inch thick either with or against the grain (I prefer against, since it’s easier to chew). Cut away as much fat as possible from the strips to prevent the jerky from spoiling once cooked.
  3. Place sliced beef in the bowl with the marinade mixture, making sure each piece is coated. Cover and refrigerate for 6 hours.
  4. Set three cooling racks on top of three baking sheets. Remove beef from the marinade and pat dry with paper towels or a clean dishtowel. Arrange beef on the racks and sprinkle coarsely ground pepper on top of meat to your liking (about 1-2 tbs).
  5. Bake for about 4 hours at 175° F, until the jerky is firm and almost completely dry, but still chewy. (Note that the original recipe specifies a 200° cook time, but I preferred the taste at 175° which may take a little longer. If you are pressed for time, 200° should still taste delicious.) Let cool completely on the racks before serving.

Use a mortar and pestle, food processor, or coffee grinder to coarsely crush peppercorns for marinade. To season the meat with additional pepper before it goes into the oven, I use my trusty pepper mill. The tricky part is slicing the meat thinly, without sending yourself to the ER. Try putting the meat in the freezer for about 30 minutes prior to slicing. This should do the trick. I like my beef jerky pretty thick so I go for 1/4 inch thick slices. The jerky will harden as it cools, so don’t let it get too dry in the oven. Store your jerky in the fridge in either a plastic baggie or mason jar. I also think this makes great gifts or favors! I found this simple recipe to be a great starting point. From here, you can experiment with different flavors and spices. Rachel Graville has a couple of other fabulous jerky recipes including Sweet & Spicy Jerky and Mexican Lime Jerky. Om nom nom nom.